Motivation
For quite some time I have been wanting to stop using Google services for my personal online data. This includes email, calendars, task lists and file sharing. I am not at ease with knowing that I rely on one company for handling all my personal online data, and that this company owns most of the market. I don’t know if Google is analyzing my vacations pictures on my drive to somehow trick me into buying stuff or voting for someone, but I know that other GAFAMs don’t have problems with such practices so we’re never too safe trying to avoid this.
My first intention was to turn to smaller providers which looked more in line with my ethics. I picked Murena, a French company who develops /e/OS, a privacy-focused mobile OS that Fairphones use. I set up an account on their platform, which I’m using now for emails. Reading about the software used behind the scenes by Murena, I discovered Nextcloud and how it is designed for self-hosting, and I decided to give it a try. Self-hosting my own Cloud services was also something that had been on my mind for some time. I was seduced by the idea of fully owning my data, and learning stuff while setting it up.
First look at Nextcloud documentation
Nextcloud “is a suite of client-server software for creating and using file hosting services” (quoting the Wikipedia article). It’s a fork of ownCloud, fully open-source, maintained by a German company. In a nutshell, now that Nextcloud is up and running on my host machine, I have my own web platform to manage my files, contacts, calendars, tasks, notes. This platform is accessible via browser or client apps on mobile and desktop.
The Nextcloud-AIO Docker image
Nextcloud proposes an official Docker image called Nextcloud all-in-one, or Nextcloud-AIO. I chose this method, because I intended to setup Nextcloud on a VPS that I use for other stuff too, so containerization was useful to separate services.
When first reading the documentation, I was a bit confused about what was included. “Nextcloud Files” and “Nextcloud Office” are explicitly mentioned in the Nextcloud-AIO Docker image description, but does that mean “Nextcloud Groupware” (calendars, contacts, mails) is not included? It turns out a Nextcloud-AIO install gives access to all Nextcloud apps, of which there are hundreds (I use only a couple though).
Default startup command
Having a look at the Nextcloud-AIO README, it seemed that setting up Nextcloud could be as simple as running a docker run command.
Now, as mentioned earlier, I had other services living on my host, notably a web server for my personal websites that already occupied ports 80 and 443 (HTTP and HTTPS traffic).
Running the default docker run command would have conflicted with these ports.
My idea was to deploy Nextcloud behind the existing reverse-proxy (nginx) that I had setup for my web server, adding it as another virtual host. This required diverting from the default scenario, and diving a little deeper in Nextcloud-AIO’s documentation to follow the reverse-proxy documentation.
Setting up Nextcloud behind a nginx reverse-proxy
First, I needed to define a domain name for my Nextcloud instance.
More precisely, I added a subdomain entry in a DNS zone I already had registered, which looked like nextcloud.my-domain.com.
Then I added virtual host in nginx to manage traffic going to this subdomain.
I used the example config provided by Nextcloud-AIO’s docs for deploying behind an already existing nginx reverse-proxy, and adapted the necessary elements:
- Nextcloud’s domain name (the subdomain I mentioned earlier)
- Nextcloud’s port (called
APACHE_PORTin the docs, Apache is used in the Nextcloud-AIO internal stack as a sub-layer web server) - Nextcloud’s address as viewed from nginx
The full final config looked like this:
map $http_upgrade $connection_upgrade {
    default upgrade;
    '' close;
}

server {
    listen 80;
    listen [::]:80;

    if ($scheme = "http") {
        return 301 https://$host$request_uri;
    }
    if ($http_x_forwarded_proto = "http") {
        return 301 https://$host$request_uri;
    }

    listen 443 ssl;
    listen [::]:443 ssl;
    http2 on;

    proxy_buffering off;
    proxy_request_buffering off;

    client_max_body_size 0;
    client_body_buffer_size 512k;
    proxy_read_timeout 86400s;

    server_name nextcloud.my-domain.com www.nextcloud.my-domain.com;

    location /.well-known/acme-challenge/ {
        root /var/www/certbot;
    }

    location / {
        resolver 127.0.0.11 ipv6=off;
        proxy_pass http://nextcloud-aio-apache:11000$request_uri;

        proxy_set_header X-Forwarded-For $proxy_add_x_forwarded_for;
        proxy_set_header X-Forwarded-Port $server_port;
        proxy_set_header X-Forwarded-Scheme $scheme;
        proxy_set_header X-Forwarded-Proto $scheme;
        proxy_set_header X-Real-IP $remote_addr;
        proxy_set_header Host $host;
        proxy_set_header Early-Data $ssl_early_data;

        proxy_http_version 1.1;
        proxy_set_header Upgrade $http_upgrade;
        proxy_set_header Connection $connection_upgrade;
    }

    ssl_certificate /etc/nginx/ssl/live/nextcloud.my-domain.com/fullchain.pem;
    ssl_certificate_key /etc/nginx/ssl/live/nextcloud.my-domain.com/privkey.pem;

    ssl_dhparam /etc/dhparam; # curl -L https://ssl-config.mozilla.org/ffdhe2048.txt -o /etc/dhparam

    ssl_early_data on;
    ssl_session_timeout 1d;
    ssl_session_cache shared:SSL:10m;

    ssl_protocols TLSv1.2 TLSv1.3;
    ssl_ecdh_curve x25519:x448:secp521r1:secp384r1:secp256r1;

    ssl_prefer_server_ciphers on;
    ssl_conf_command Options PrioritizeChaCha;
    ssl_ciphers TLS_AES_256_GCM_SHA384:TLS_CHACHA20_POLY1305_SHA256:TLS_AES_128_GCM_SHA256:ECDHE-ECDSA-AES256-GCM-SHA384:ECDHE-ECDSA-CHACHA20-POLY1305:ECDHE-ECDSA-AES128-GCM-SHA256:ECDHE-RSA-AES256-GCM-SHA384:ECDHE-RSA-CHACHA20-POLY1305:ECDHE-RSA-AES128-GCM-SHA256;
}
I describe below in more details a couple of key points in this nginx config.
Nextcloud’s address as viewed from nginx
In my case, nginx was deployed as a Docker container in my web server’s Docker compose stack (which I describe in a previous blog post). So I could use a Docker bridge network to allow communication between the nginx container the Nextcloud-AIO containers. I defined the bridge network as follows in my compose file:
services:
  nginx:
    ...
    networks:
      nextcloud-net
...
networks:
  nextcloud-net:
    driver: bridge
And I restarted nginx (with a complete docker compose down/up cycle, because a simple docker compose restart wouldn’t update the container’s networks).
Since my nginx compose file was located in a directory called webserver_tvoirand, Docker compose named the network webserver_tvoirand_nextcloud-net.
Once the bridge network was defined, nginx would view Nextcloud at the address http://nextcloud-aio-apache:$APACHE_PORT, provided I started Nextcloud-AIO with an environment variable APACHE_ADDITIONAL_NETWORK and the bridge network as value.
Docker resolver
In fact, nginx still had trouble viewing Nextcloud at this address.
This didn’t block me directly when starting the nginx and Nextcloud containers, but caused an error later during domain validation, the step where Nextcloud is first accessed via its domain name and nginx processes the traffic.
This message in the nginx container logs gave me a clue: no resolver defined to resolve nextcloud-aio-apache.
It seems nginx by default was not able to find the Nextcloud container IP based on its Docker service name.
I needed to explicitly tell nginx to rely on the Docker DNS resolver, by adding the resolver 127.0.0.11 ipv6=off; directive in the config, just before the proxy_pass directive.
IPv6 is turned off because the Docker DNS server uses only IPv4 by default.
SSL certificates
In my web server Docker compose stack, a certbot service handles SSL certificates, which are necessary for HTTPS traffic.
The certificates files live in a bind-mount, shared by both certbot and nginx services, and which is mapped to /etc/nginx/ssl in the nginx container.
I needed to update these paths in my nginx config for Nextcloud-AIO:
    ssl_certificate /etc/nginx/ssl/live/nextcloud.my-domain.com/fullchain.pem;
    ssl_certificate_key /etc/nginx/ssl/live/nextcloud.my-domain.com/privkey.pem;
To actually obtain the certificates, I also needed nginx to serve the acme-challenge files used by certbot by adding a location rule:
    location /.well-known/acme-challenge/ {
        root /var/www/certbot;
    }
And I went through the certbot flow described in the web server blog post (creating dummy certificates, starting nginx with the new config, request real certificates with certbot, restarting nginx).
DH params file
The example nginx config includes a ssl_dhparam directive, with a comment explaining how to obtain the dhparam file used in this directive.
The dhparam file contains a set of parameters used in the Diffie-Hellman (DH) key exchange, a cryptography method which strengthens the SSL/TLS handshake used in HTTPS traffic.
To avoid having to copy this file again if I needed to start a fresh nginx container later, I stored it once on my host and shared it with the container using a bind-mount.
I downloaded the dhparam file on host, as instructed in the nginx config example:
mkdir ssl
curl -L https://ssl-config.mozilla.org/ffdhe2048.txt -o ssl/dhparam
And added it as bind-mount for the nginx container in my compose file:
services:
  nginx:
    ...
    volumes:
      - ./ssl/dhparam:/etc/dhparam:ro
Defining the Docker compose service
After writing the nginx configuration file, I was ready to start Nextcloud-AIO. My startup command was basically the default command, to which I added environment variables related with nginx. It looked like this:
sudo docker run \
--init \
--sig-proxy=false \
--name nextcloud-aio-mastercontainer \
--restart always \
--publish 8080:8080 \
--env APACHE_PORT=11000 \
--env APACHE_IP_BINDING=0.0.0.0 \
--env APACHE_ADDITIONAL_NETWORK="webserver_tvoirand_nextcloud-net" \
--env NEXTCLOUD_DATADIR="/home/myuser/nextcloud/data" \
--env SKIP_DOMAIN_VALIDATION=false \
--volume nextcloud_aio_mastercontainer:/mnt/docker-aio-config \
--volume /var/run/docker.sock:/var/run/docker.sock:ro \
ghcr.io/nextcloud-releases/all-in-one:latest
I usually define a fixed version tag for my Docker images for reproducibility reasons.
But in this case, the latest tag should be used to let Nextcloud-AIO manage updates (more on that in the update section below).
Note that I included a NEXTCLOUD_DATADIR environment variable, to easily access the Nextcloud data from my host for manual export and backup.
I wrote the equivalent of this command as a new nextcloud service in my web server’s compose file, which ended up like this:
services:
  nginx:
    image: nginx:1.28-alpine
    ports:
      - 80:80
      - 443:443
    restart: always
    networks:
      - nextcloud-net
    volumes:
      - ./conf.d:/etc/nginx/conf.d:ro
      - ./ssl/dhparam:/etc/dhparam:ro
      - ./certbot/www/:/var/www/certbot/:ro
      - ./certbot/conf/:/etc/nginx/ssl/:ro

  nextcloud:
    image: ghcr.io/nextcloud-releases/all-in-one:latest
    init: true
    restart: always
    container_name: nextcloud-aio-mastercontainer
    volumes:
      - nextcloud_aio_mastercontainer:/mnt/docker-aio-config
      - /var/run/docker.sock:/var/run/docker.sock:ro
    ports:
      - 8080:8080
    networks:
      - nextcloud-net
    environment:
      APACHE_PORT: 11000
      APACHE_IP_BINDING: 0.0.0.0
      APACHE_ADDITIONAL_NETWORK: webserver_tvoirand_nextcloud-net
      NEXTCLOUD_DATADIR: /home/myuser/nextcloud/data

  certbot:
    image: certbot/certbot:v4.1.1
    volumes:
      - ./certbot/www/:/var/www/certbot/:rw
      - ./certbot/conf/:/etc/letsencrypt/:rw
    depends_on:
      - nginx

volumes:
  nextcloud_aio_mastercontainer:
    name: nextcloud_aio_mastercontainer

networks:
  nextcloud-net:
    driver: bridge
Accessing AIO interface and validating domain
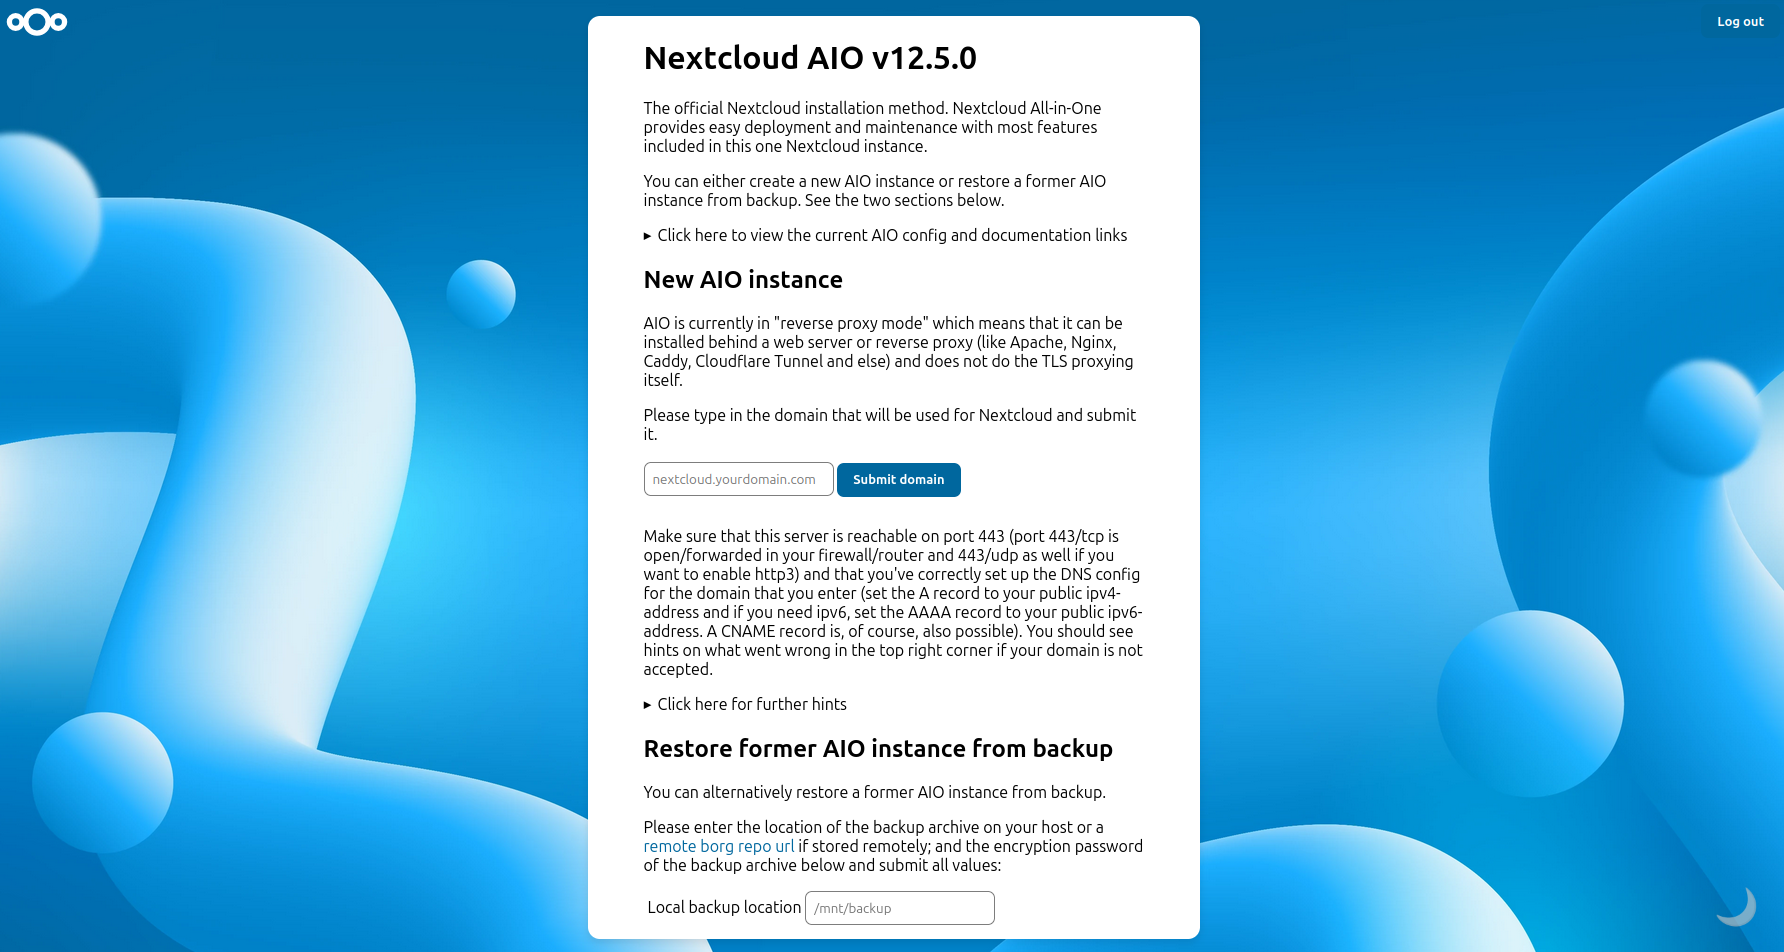
After starting the service with docker compose up -d nextcloud, the next step was to let Nextcloud-AIO validate the domain I had configured (nextcloud.my-domain.com).
For this, following the docs, I reached the Nextcloud-AIO interface in my browser, accessible on port 8080 of my host: https://<host-IP>:8080.
The domain check succeeded (after I fixed my nginx resolver issue, as mentioned above), and I reached the setup page for new Nextcloud-AIO instances. The interface is quite straight-forward so I won’t describe this part of the setup in detail.
Upgrading host
The setup in the AIO interface went fine, but I still couldn’t access Nextcloud itself when trying to access its domain in my browser. This was because my host had insufficient specs. I had chosen the smallest VM proposed by my hosting provider, with 1 CPU and 2 GB RAM, and it was at full throttle when trying to access my Nextcloud instance. This official guide for setting up Nextcloud-AIO specifies a minimum of 2 CPU and 4 GB RAM. After upgrading my VM to these specs, I was able to access my instance.
Starting using Nextcloud-AIO: customization and finalizing setup
I logged in to the admin account using the initial credentials provided in AIO setup after the domain check, and started by creating a standard user for my personal account. This way I would use the admin account only when I needed to. Creating users and trying out all Nextcloud functionalities was pretty straightforward and everything worked smoothly.
Before considering the setup over, I wanted to perform a first round of backup and update, just to make sure I wouldn’t have any issue with this in the future.
Backup
Nextcloud-AIO provides a quite convenient backup solution, described in this section of AIO’s docs. It is managed in the AIO interface, which, when Nextcloud is running, is accessed by a link in the admin user workspace (after logging in: user menu > “Administration Settings” > “Open Nextcloud AIO Interface”). The UI is quite clear so I won’t describe it here. I ran a little test to ensure that it was working fine: I backed up the instance, deleted a user, and restored the backup, everything was back in place.
This solution uses borgbackup to perform incremental backup.
The issue I had with it was that it doesn’t provide access to the backed-up data in an open format, so if something went wrong with my instance and for any reason I wasn’t able to use Nextcloud-AIO, I wouldn’t be able to access my data.
Therefore, I went a bit further and setup a script to manually export the data in an open format.
I won’t describe it here in detail either, but in a nutshell, I simply (1) copy the files stored in the NEXTCLOUD_DATADIR, and (2) use the calcardbackup community container to export calendars and contacts.
Update
Updates are normally performed through the AIO interface, as described in this section of AIO’s docs. A message indicates if containers should be updated, and the update is a matter of a couple of clicks that stop and restart the containers.
For this update method to function correctly, the latest tag should be used for the Nextcloud-AIO Docker image.
But in my case, when I first set up my instance, I used a fixed image tag (like nextcloud/all-in-one:20250325_084656).
I usually do this for reproducibility reasons, because omitting a tag is equivalent to using latest, which can yield a different version each time the image is pulled.
So I manually upgraded my containers to the latest version (which is not the recommended method), so that AIO could perform upgrades normally in the future:
- I first stopped the containers through the AIO interface, which left only the
nextcloud-aio-mastercontainercontainer up, all other Nextcloud containers being stopped (exited) - I stopped the Nextcloud compose service with
docker compose down nextcloud, which removed thenextcloud-aio-mastercontainercontainer - I removed all other Nextcloud containers
- I changed the image tag of the
nextcloudservice in the compose file toghcr.io/nextcloud-releases/all-in-one:latest(tag used in AIO’s documentation) - I started the Nextcloud service again with
docker compose up -d nextcloud, and after some startup time, the newnextcloud-aio-mastercontainerwas healthy
After this manual update, I was able to upgrade the other Nextcloud containers using the recommended method through the AIO interface.
Conclusion
Overall this setup was made easy by the qualitative Nextcloud and Nextcloud-AIO documentation. I was mildly confused at first by the terminology for Nextcloud “Products”, “Apps”, “Community Containers” and such. But after a little reading and getting my hands on things, it quickly became clearer.
To summarize the setup:
- I read the documentation, and, based on my configuration, selected the Nextcloud-AIO behind reverse-proxy deployment method
- I configured the nginx reverse-proxy, which required a little bit of familiarity with web servers and networking
- I defined the Nextcloud deployment in my Docker compose stack
- I performed a round of backup and update to check that everything worked fine, including both the standard methods managed by Nextcloud and manual methods
And there I had my own Nextcloud instance to manage my personal online data. One step towards digital freedom!